A very important part of growing tomatoes is that it is necessary to support them vertically as they grow large. This particular need is taken care of by using cheap and easy DIY tomato cages to give the plant the vertical support it needs to grow properly.
As almost all tomato farmers can attest, you need good tomato cages for support whether they are grown in the ground or a pot, and sometimes the store-bought tomato cage just can’t provide that kind of support over a long time.
Most of them break after a year or two, usually when you remove or add them to your garden. The wires are pulled loose after a little while, and due to their flimsy construction, they can end up broken when you are taking care of your tomatoes.
Note:
It’s known that they are advertised as reusable every time you plant tomatoes, but the truth is that they can become damaged just by removing or inserting them into the ground.
There is also the problem of storage space. Due to the size of the tomato cages and their inability to be flexible, storing the cages can be a real problem.
Most people don’t know that building tomato cages yourself is a relatively simple and inexpensive task. By using a couple of different techniques and ideas, it can also be made to look attractive in your garden.
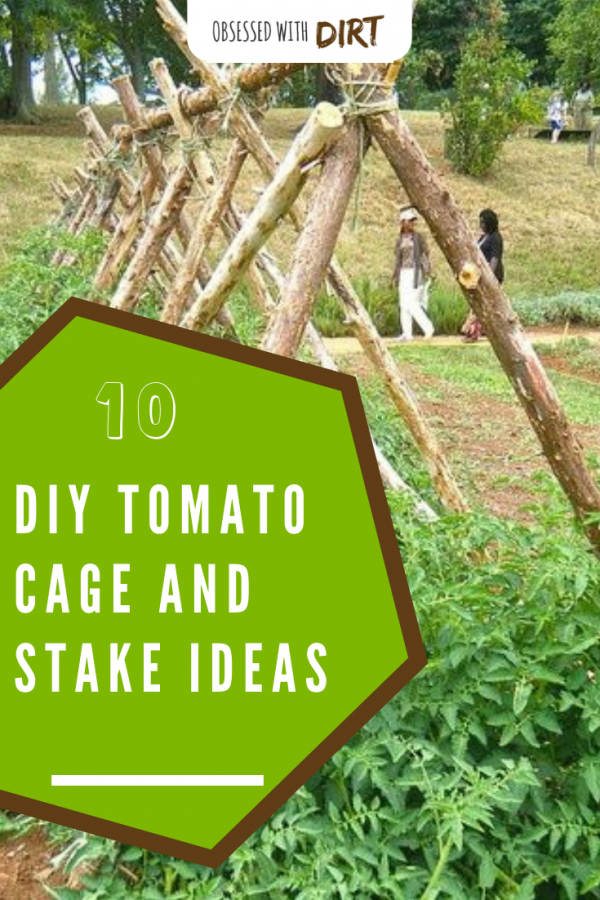
Here are 10 DIY ways to build tomato cages for your garden:
Cattle Panels Tomato Cages:
Despite being made to keep the cattle in a designated area, they are surprisingly good at providing plants with vertical support.
This 16 x 4-foot metal fence is usable as a plant support system. It requires a little manual labor, and since this is a DIY project, I think manual labor is kind of mandatory. Oh, and don’t forget to bring your bolt cutters.
Instructions:
First, you need to make the width of the fence just six squares wide. Cut the rest of the remaining squares along the length of the panel. Next, you need to shorten the length of the panel to about 9 squares.
For the last line of horizontal squares, you need to remove the horizontal wires so that your panel can go deep into the soil to support itself and stay upright.
Repeat this same process for the remaining piece of the original panel. Place a straight piece of lumber at least as long as the panel in the middle, such that three squares are showing on the side of the lumber.
Then, pull on the end until the panel is at a 90-degree angle; it should look like a rectangle without two sides. Do the same thing to the other remaining panels.
Note:
Now, before you insert the panel into the soil, you should take a minute and straighten out the ends of the panels so that they are all even with each other; this provides more stable support. Now, insert both panels around the plant so that the plant is centered within the cage.
You now have your very own tomato cage made by a livestock panel and your own two hands. A very surprising thing you will notice at the end is how cheap this was, and the best part is that it can be easily restored and reused next year since the panel does not rust.
Cage/Stake Hybrid:
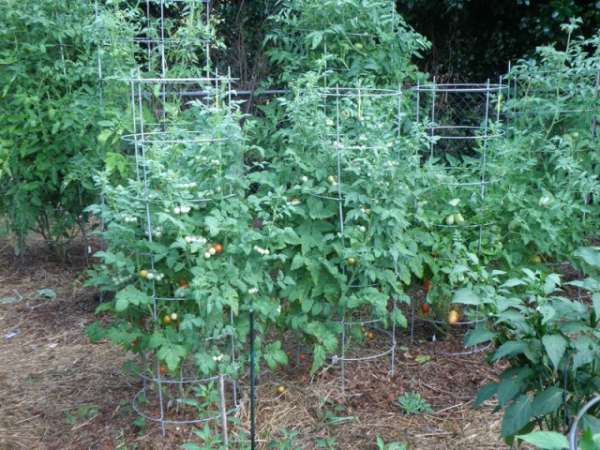
This cage/stake hybrid is a steel wire panel held up by a stake, which is obvious given the name. You make a cage/stake hybrid, or stake-a-cage, by planting a large wooden stake deep into the ground to provide basic yet strong support for the plant. When you grow tomatoes in a 5-gallon bucket, I recommend you use this wire cage to support your plants.
Attach the wire panel to the stake using fencing nails. You can easily wrap the tomato plant across the panel and have a lot of free room to grow. It combines the strong and durable support of the stake with the ease and benefits of a wire-panel trellis.
You can easily pick your harvest at the end of the season, which is easy with cages.
Materials:
You will need wire cutters, fencing nails, a saw, a hammer, 2x2x8 feet lumber stakes, and a 30″-high welded wire fence. Use the saw to make a pointed end on lumber and then bury it 16” in the dirt. Next, use the wire cutters to cut the fence into an 18×16-inch grid.
What to do:
Just hammer the fence into the wood using three fencing nails at the center, also known as U-nails. Note: Only use U-nails since they are perfect for this job, and other nails usually end up being pulled out by the weight and lack of support.
You now have your very own stake-a-Cage, and the best part is that all this costs is a little effort and approximately 2 dollars. Plus, these handy cages can last up to 5 years.
If you need continuous support made of durable and excellent materials, check out F.O.T Sturdy Garden Plant Support Stakes 3-Sets Tomato Plant Cage, which is available for sale. Highly recommended!
Want to know tips and ideas on different tomato varieties you can grow? Check out our helpful blog 14 Best Tomato Varieties to Grow.
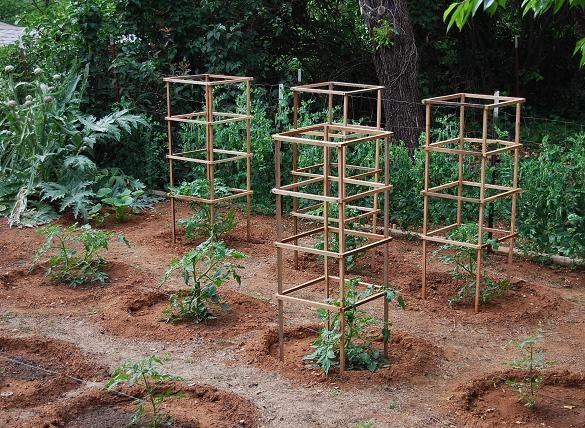
Wood Frame Tomato Cages:
As the name suggests, it is a tomato cage made entirely of wood. It is a very simple and easy-to-make project that only requires a little effort. Since you only need some wood and nails, the cost of making this cage is very low.
Materials:
You need two 2x2x8’ boards cut in half and three 1x2x8’ boards cut into different sizes. Cut the three 1x2x8’ boards into six 1x2x18” and six 1x2x19.5”. The two 2x2x8’ boards you cut in half at the beginning will be the four corners of your cage, and the rest will support the plants.
Instructions:
Take the two corner boards and lay them out flat, starting from the absolute top, hammer 3 of the remaining smaller boards, leaving at least 15” between each board. At this point, you should have something resembling a ladder.
Repeat this process with the other set of poles; now you have two ladders. Now you nail the remaining wood pieces to both sets of ‘ladders’, leaving 15” gaps between them, same as when making the first set.
Note:
When you are done joining the boards of wood, you should notice that the last piece of side wood and the end of the poles have a larger gap between them than the other side pieces; this is fine; it is supposed to be this way.
Now you plant the cage poles a few inches into the dirt. Since wood cages are more durable and heavier, you don’t need to plant them too deep.
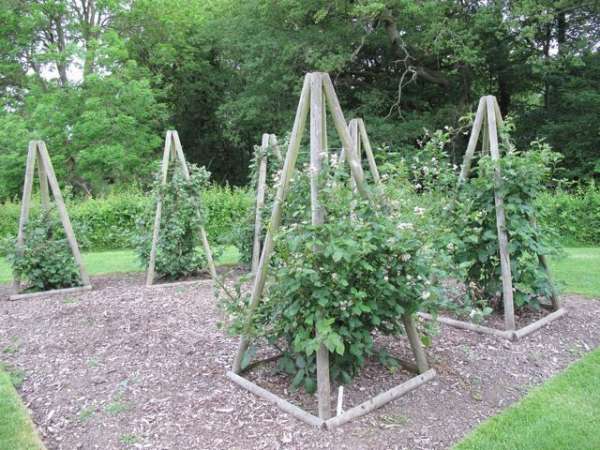
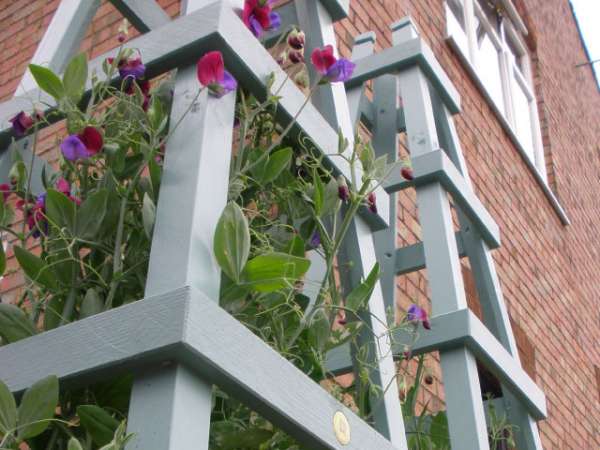
DIY Obelisk:
Instructions:
First, lay the columns on a flat surface at an angle. Cut the length of the rungs according to the space in between the two columns at different points. The space of the first rung will be the largest and at least 6 inches from the bottom. The second rung will be a little shorter since it will go in the middle, and the shortest rung will be at the top.
Note:
Remember to keep the angle the same for the other columns and make 4 rungs for each step. Traditionally, the obelisk has 5 rungs, but a little more or less according to your needs won’t hurt. It will look charming on your yard or terrace while supporting your growing tomatoes.
PVC Tomato Cage:
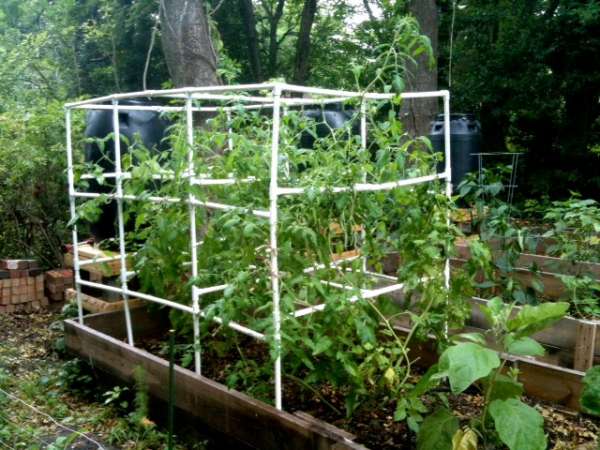
Whoever invented this particular method is a genius. This cage uses the PVC’s extremely lightweight and almost unbreakable body to give you the perfect tomato cage.
With the PVC, you can easily assemble and disassemble the cage as per your needs, and since it won’t wither with time or break, you can use it for an indefinite amount of time. First, you’ll need 4 ½ inch T’s, 20 ½ inch elbows, 20 of the 10-inch straight PVC pipes, and 20 ½ 20-inch crosses.
Instructions:
First, you want to attach two 10” pipes to a cross, on opposite sides to each other, with one side facing up and one side in the dirt. Do this for 4 crosses, and at the end of 4 of the 10” pipes, attach an elbow and then attach the remaining pipes on the other side of the elbow so that you have a square.
The hole that faces up on each cross should have a pipe in it. Repeat the same process, only this time attach the crosses on the pipes facing up. Keep going until you reach your desired height for the cage.
Folding Tomato Ladder:
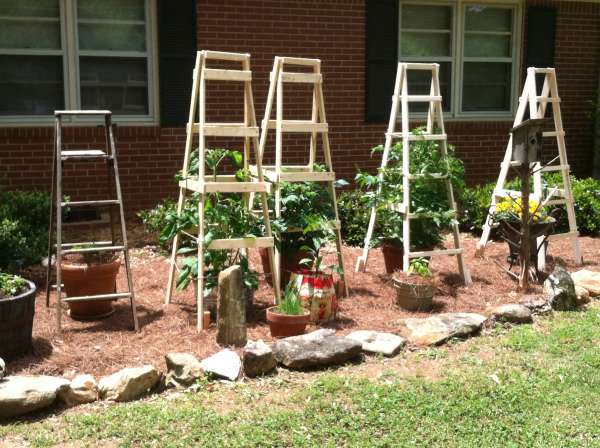
The concept of the folding tomato ladder is quite simple; as the name suggests, it can be folded.
Instructions:
First, you attach two 1”x3” 8 feet long wooden strips at the top and do the same with two more of the same wooden strips. Now take a 2×4 inch scrap board and attach the wooden strips at the top using 3” deck screws.
Now attach some rungs on the bottom of the ladder since they aren’t needed at the top, and voila, you have your very own, easy-to-make, folding tomato ladder.
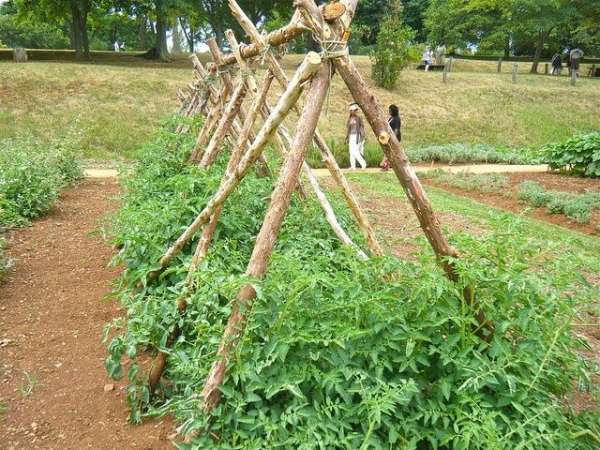
Tomato Teepee:
I think the design can be interpreted just by reading the name, but I’ll reiterate: yes, it is a teepee. Get 5 bamboo stakes and properly wedge it into the ground at a slight angle. Make sure that bamboo sticks form circular shapes and wrap them at the top where they intersect.
Things to Remember:
Make sure to use a strong rope or twine and wrap it until it feels like nothing can break it. Plant a tomato plant at the bottom of each bamboo stick, and as the plant grows, make sure to wind the main stem around the stick.
Simple Stake and Twine Tomato Cage:
They say that you shouldn’t judge a book by its cover, but in this case, you can ignore it. What you read in the name is pretty much what it is. It is 4 support sticks placed in a square shape around the tomato plant and has walls of twine.
Note:
This is the most easy-to-make and cheap cage you can find out there, and it won’t take more than 10 minutes to make.
Wondering how to fix blossom end rot for your tomato garden? Check out our helpful blog on Blossom End Rot – What Is It and How to Fix It.
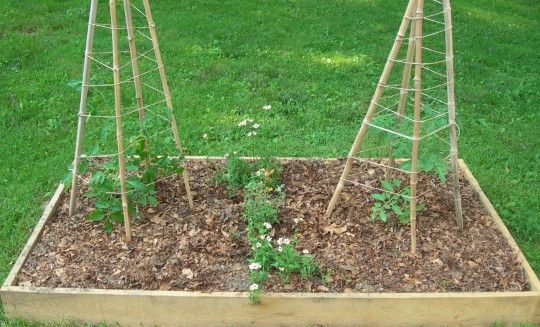
Bamboo Tomato Cage:
It is like a Tomato teepee with slight differences. The most major is that one cage will only cover one tomato plant. First, you plant the four 6-foot bamboo in the ground at an angle similar to the tomato teepee cage. Then, it would be best to tie the bamboo with twine where they intersect.
Instructions:
Get two more bamboo sticks and mark the tree places in the teepee. This is where you must put the “rungs of the ladder.” Measure the spaces in between the sticks at your desired points.
Using a handsaw, cut the bamboo sticks in the length of the spaces. Make sure that you cut for all four sides. Attach the “rungs” using twine, starting with the largest stick at the bottom and the smallest at the top. These steps will ensure that your tomato plant does not start sagging under its weight.
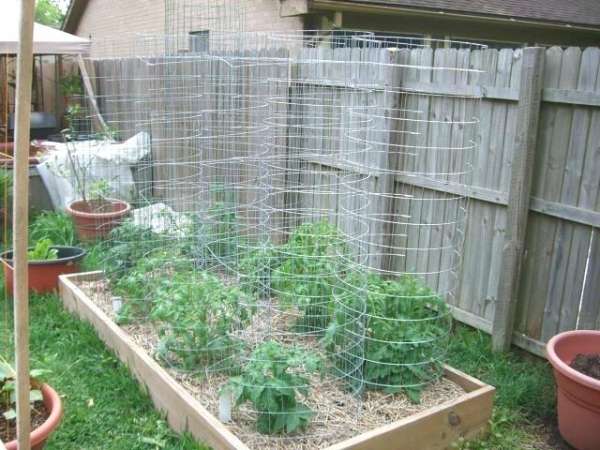
One Cage for All Your Tomatoes:
As the name says, this wire cage will surround all your tomatoes like a giant cage. You will need two galvanized welded wire panels, wire cutters, 4 pieces of rebar, and some twine.
Instructions:
First, you should cut off the bottom wire row so the panels can go deeper and have more support. Plant the panels at an angle on each side of your tomatoes. Then, drive the rebar into the soil outside of the panels. Finally, run the twine through the entire panels in a zig-zag formation. They will be able to provide support to the growing plants.
Besides the 10 DIY methods described above, here is another cheapest way to hold your tomato plant up. You need 6 coat hangers, pliers, wire cutters, and a few cable ties.
Here is how you do it.
Straighten the coat hangers to untwist them until you get a straight length of wire. Use pliers for this. Insert three coat hangers into the soil around your plant, 8 inches from the stem. Plant the wires 6 inches deep into the soil, spacing the wires evenly around the tomato plant.
Make a loop using pliers at the end of one of the remaining hangers. Insert a cable tie into this loop and attach the loop to one vertical hanger 4 inches above the soil level. Fasten the cable tie securely to attach the two hangers.
Pull the attached hanger horizontally around the three vertical hangers, stretching it around each hanger back to the starting point. Allow 2 inches of extra hanger wire and cut off any excess wire using wire cutters.
Make another loop at the end of the hanger and attach it to the same vertical hanger using a cable tie. Attach the horizontal hanger to the other two vertical hangers with cable ties.
Repeat the process to add two more horizontal hangers, spacing them 8 inches apart along the vertical hangers. Snip off excess vertical hanger wires above the top horizontal hanger with wire cutters to finish the tomato cage.
For heavy-duty tomato cages, you can consider making the cage using the best long-lasting materials like metal, concrete reinforcing wire, or wood, and the best cages are about 5 feet in height and 2 feet wide. The most commonly used shapes for tomato cages are rectangular, triangular, and ring-style.
If you want to protect your tomato garden from unwanted animals, check out Erva Bunny Barricades. Excellent anchors to keep the cages secured to the soil and guaranteed protection, too.
Do you want to be as creative as possible regarding your garden? Check out our blog on Crafty Container Vegetable Gardening Design, Ideas and Tips.


- Everything You Wanted to Know About Red Tamarillos - June 2, 2025
- A Guide to Tulips: Everything You Need to Know & More… - June 2, 2025
- Guanabana: Description, Flavor, Benefits, And Uses - May 27, 2025
4 thoughts on “10 Cheap and Easy DIY Tomato Cages”
Comments are closed.