Every gardener has at least heard of home composting even if they don’t use the methods. Many gardeners prefer to use easy composting methods because it is considered to be a greener alternative, both environmentally and economically. It is also easy to make and you don’t even have to leave your home to make these composts. These are very easy composting methods ideal for lazy gardeners.
These methods are sustained by your garden and for your garden. Consider this: you usually clean your garden of fallen leaves and twigs and every kitchen in the world leaves some form of organic waste.
Note:
All of these things can be easily found within your immediate vicinity and be used to make that rich compost or “black gold”, as some farmers like to call it. This is a sustainable model that can be used indefinitely.
By enriching your soil you ensure that your plants grow healthy, these plants then shed their leaves, the leaves combined with the waste from your kitchen make the compost which is then used to enrich the soil, again, and so the cycle continues.
Trench Composting:
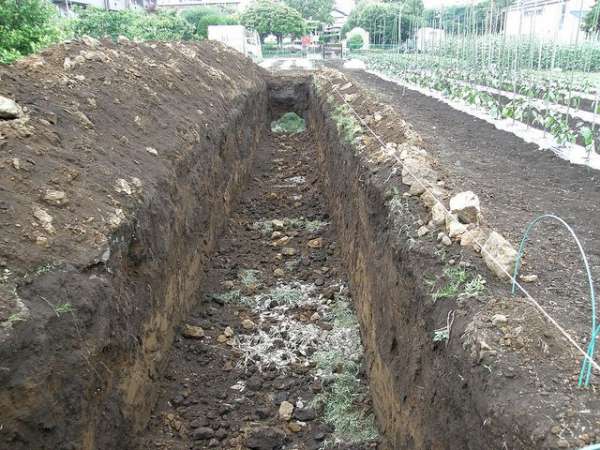
First we start off with the laziest of the composting methods known as trench composting. This methods requires very little effort on your part. First you start off with digging a hole in the ground, it doesn’t necessarily have to be large.
Just enough that you can fertilize your garden. After you are finished with digging the hole, you should start dumping all your waste in to it, start with all leaves and weeds that you collect from your garden and add some food or vegetable scraps to the pile.
Note:
Make sure that none of the things you have added are too large in size otherwise they may take a longer time to break down. The benefit of using this method is that it only takes a couple of weeks to give you that rich black soil that you want.
A side benefit is that, when you bury it in the ground, the worms and micro-organisms in the dirt help in breaking down the ingredients thus speeding up the process while the dirt layer on top protects it from the critters that would have otherwise made their home in the pile. After a few weeks dig up the soil and voila, you have your rich black compost with minimal effort from you.
A good general book for setting up a composting system is Let it Rot!: The Gardener’s Guide to Composting by Stu Campbell. Go ahead and check it out!
Cold Composting:
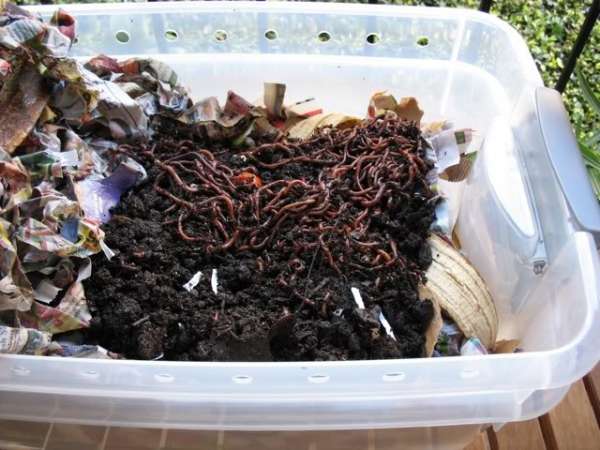
At the number 2 spot we have cold composting. A longer method then the trench composting but it is just as easy to do. This method will take approximately 6 months or less to produce the desired results but after you have done the initial steps, the rest is just playing the waiting game.
Cold composting, also known as worm composting, makes use of worms and other creepy crawlies to break down the heap in to compost. Take a bin and add all the waste in to it. A good thing to remember is to keep the ratio of green to brown 1:3. The brown consists of dead leaves, twigs, dried weeds, paper and saw dust from untreated lumber.
Note:
The green consists of kitchen scraps, garden trimmings, grass clippings and such. The most frequently asked question is whether you should turn the compost regularly or not. The answer is that it does not matter.
Turning the compost can speed up the process and not turning it will have the same result. It just takes a little longer to get there. After about 6 months, you can spread the “black gold” all over your soil for better produce.
Utopia Kitchen’s Stainless Steel Compost Bin is a high quality, stylish and sleek design ideal for kitchen use. Check it out!
Lawnmower Composting:
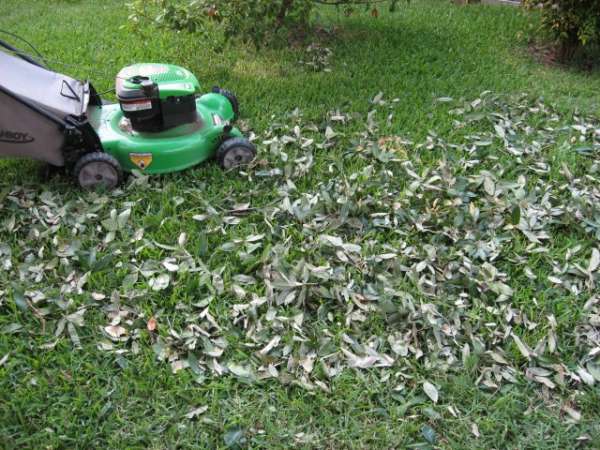
In fact it only makes use of the grass clippings left over from mowing the lawn. As all methods of composting tells you that you need to have some brown and some green to make your compost, the lawnmower composting method uses only grass but what most people don’t realize is that not every single blade of grass is green, some of the blades of grass end up brown well before they are cut.
So when this method uses only grass clippings, don’t be afraid because there is also some brown in their too. What you have to do is basically pile up all the grass in a metal cage and as you pile it up, keep spraying the pile with water to dampen it up.
Note:
If you are looking for a quick result then you will have to put in some effort. But if you have time to kill then you can just leave it as it is and in about 12 to 18 months you will have turned normal grass clippings in to compost.
If you cannot afford to wait then what you need to do is that every 3 to 5 days you should take apart all the pile and mix it, then put it back in a the pile in the cage while spraying it with water to dampen it. This way produces results in about 1 to 1.5 months but as you can see it requires a lot of effort.
A powerful and durable lawn mower ideal for composting is 20-Inch 12 Amp Corded Lawn Mower by Greenworks. Highly recommended!
Wondering what tools are needed for your garden? Our blog on 15 Essential Gardening Tools For Small Organic Gardens may answer your questions. Check it out.
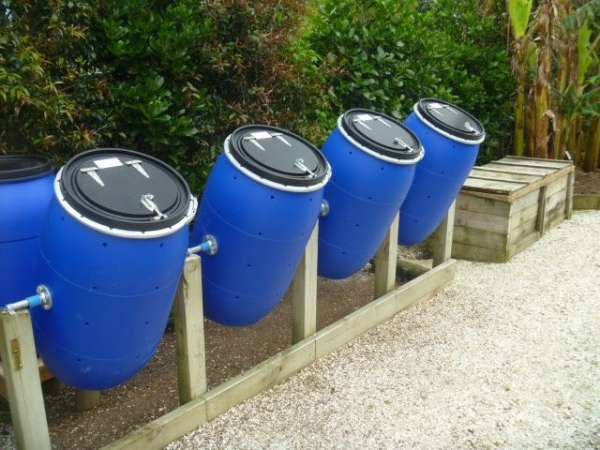
Trash Can Composting:
Yes, it is as the name suggests: you make your compost in a trash can. What you need to do is to first get a trash can and put some holes at the bottom to provide a way for the air to flow. To make sure that no critters get in there, put the trash can on some bricks so that it is above ground. Add in some of the food scraps and equal amounts of brown matter to the trash can.
Note:
Make sure that the materials have some dampness to them, so in the dry season try to spray a little bit of water on to the pile so that it remains damp and can be broken down easily. As time progresses, keep adding more materials as you go, usually in the same quantity of green and brown matter.
Be sure to keep the lid on to trap the heat in the can. After about 3 months you will have your compost ready to enrich your soil and all you had to do was throw the waste in the can.
If you are looking for odor free, convenient and sturdy compost bin bucket, check out Kitchen Compost Bin with Charcoal Filters below.
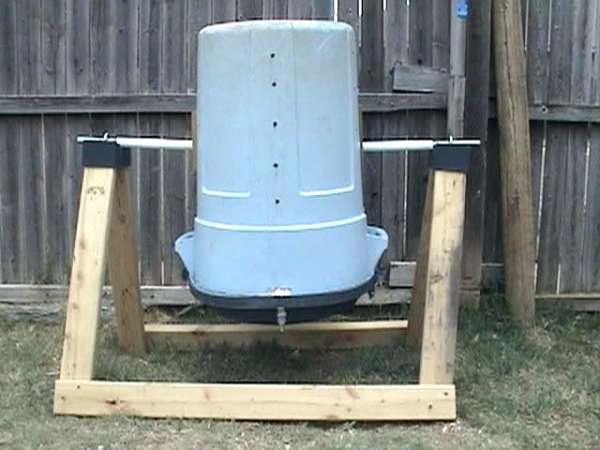
Tumbler Composting:
This particular method makes use of a tumbler system to make the compost instead of just stirring the pot. First off, you should know what a tumbler is. They are, basically, circular cylinders mounted on a frame that elevates it slightly above the ground.
They usually have a handle on the side that is used to turn the cylinder and the contents inside. What you need to do is to put all the compost making ingredients inside. Keep in mind that the tumbler composting method is to be used for cold composting only because it is near impossible to achieve and maintain the necessary temperature required for hot composting.
Note:
When you have added all the ingredients in to the tumbler, it is a good idea to add some soil to the mix so as to speed up the process by adding microbial life that helps break down the ingredients. If this method is used correctly then your compost can be ready in as little as three weeks.
But you need to give the tumbler a couple of turns every day and since you would use the roller mechanism of the tumbler, it’s not really that great an effort. Perfect for lazy gardeners. The only drawback is that it can’t be used for hot composting and the volume of compost created is quite limited.
Avoid digging and mixing your compost pile by hand. Check out Yimby’s Tumbler Composter. The tumbling design makes mixing easy and efficient!
Want to know more about growing vegetables for your garden? Check out our helpful blog on 27 Tips For Beginner Vegetable Gardeners.
Piling Compost:
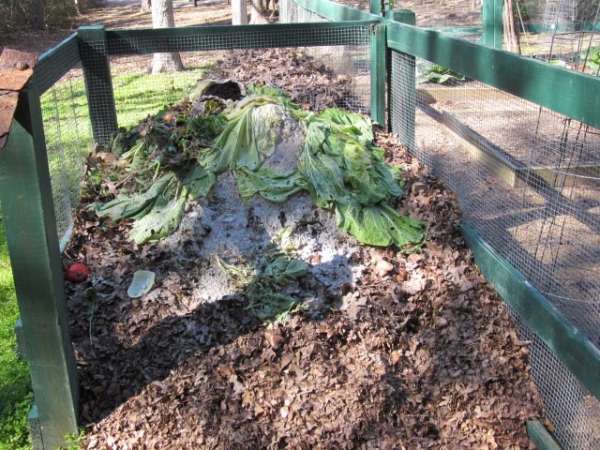
One of the most laziest, easiest and most rewarding composting methods is the piling compost. Literally, all you have to do is to make a pile of compostable materials. When the pile is complete, all you have to do is turn it every 2 to 4 weeks. If you wish for faster results, turning it every 4 to 5 weeks will yield the same result but will take longer.
Note:
The only con I can think of this is that it might look unseemly, unless you can camouflage it within the garden design, in which case no problems. Overall, this method requires no construction, no additional materials, your compost pile can produce as much as you want and due to no restrictions on shape of the pile, turning the pile is a breeze.
Just don’t make the pile over 5 feet tall else it might collapse in on itself which will ruin the air pockets within the pile that help with the decomposition. Once you have visual confirmation of the “black gold” it’s safe to spread it over the soil for much better produce.
Jobe’s Organics Compost Starter with Biozome is ideal for compost piles and speeds up the composting process. It’s very affordable and easy to use.
Sheet Composting:
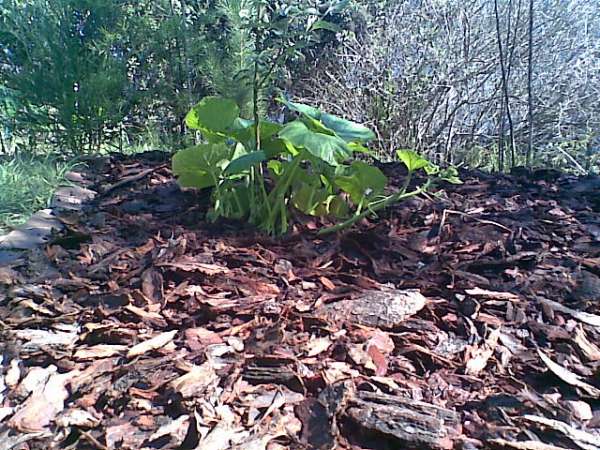
Another great method of producing compost for lazy gardeners is the sheet composting method, and no, it does not involve a sheet. It is basically just trench composting only with a different approach on how to use it. For this method, your garden needs to be just soil, no plants.
You dig up a small layer of the soil from the top and instead of dumping all the materials in a single hole, you reduce them to small pieces and spread them all over the dug up areas. After that you just cover it up with the soil and wait.
If you do this in the fall then the materials will have turned in to compost by the time you get to planting otherwise you need to wait about six months for all the materials to be turned in to compost.
Note:
The ingredients need to be an even ratio of green to brown. Make sure that none of the materials are overly large woody items, such as wood chips since they take a much longer time to break down and might end up stunting the growth of the roots of your plants.
Many beginner composters have questions such as “How do I get the ratio of green to brown just right?” or “What is layering?” Well here are some tips to help you along the way.
You don’t have to worry about the ratio all that much because it is not an exact science.
Just eyeball it and make estimations, you will be fine. If the compost starts to smell too much, it is an indicator that you have added too much green or nitrogen. You will hear that “layering” is an important part of making your own homemade compost. It is not. The microbial life that breaks down the greens and browns in to compost don’t about layers and neither should you.
Remember:
When you are using hot composting technique, make sure that your container is not in a shaded area. The hot composting method requires a lot of heat in order to break down the materials, so you should choose a spot that is almost always in the sun during the day.
Don’t be afraid to turn the pile every now and then, a little turning never hurt anybody.
There you have it, some of the laziest and most beneficial methods of composting for lazy gardeners.
P.S Planning to grow tomatoes for your garden? Do you know that there are several tomato varieties to choose from? Check out our blog on 14 Best Tomato Varieties to Grow for helpful tips from yours truly!


- Everything You Wanted to Know About Red Tamarillos - June 2, 2025
- A Guide to Tulips: Everything You Need to Know & More… - June 2, 2025
- Guanabana: Description, Flavor, Benefits, And Uses - May 27, 2025
Last update on 2026-05-20 / Affiliate links / Product Images from Amazon Product Advertising API